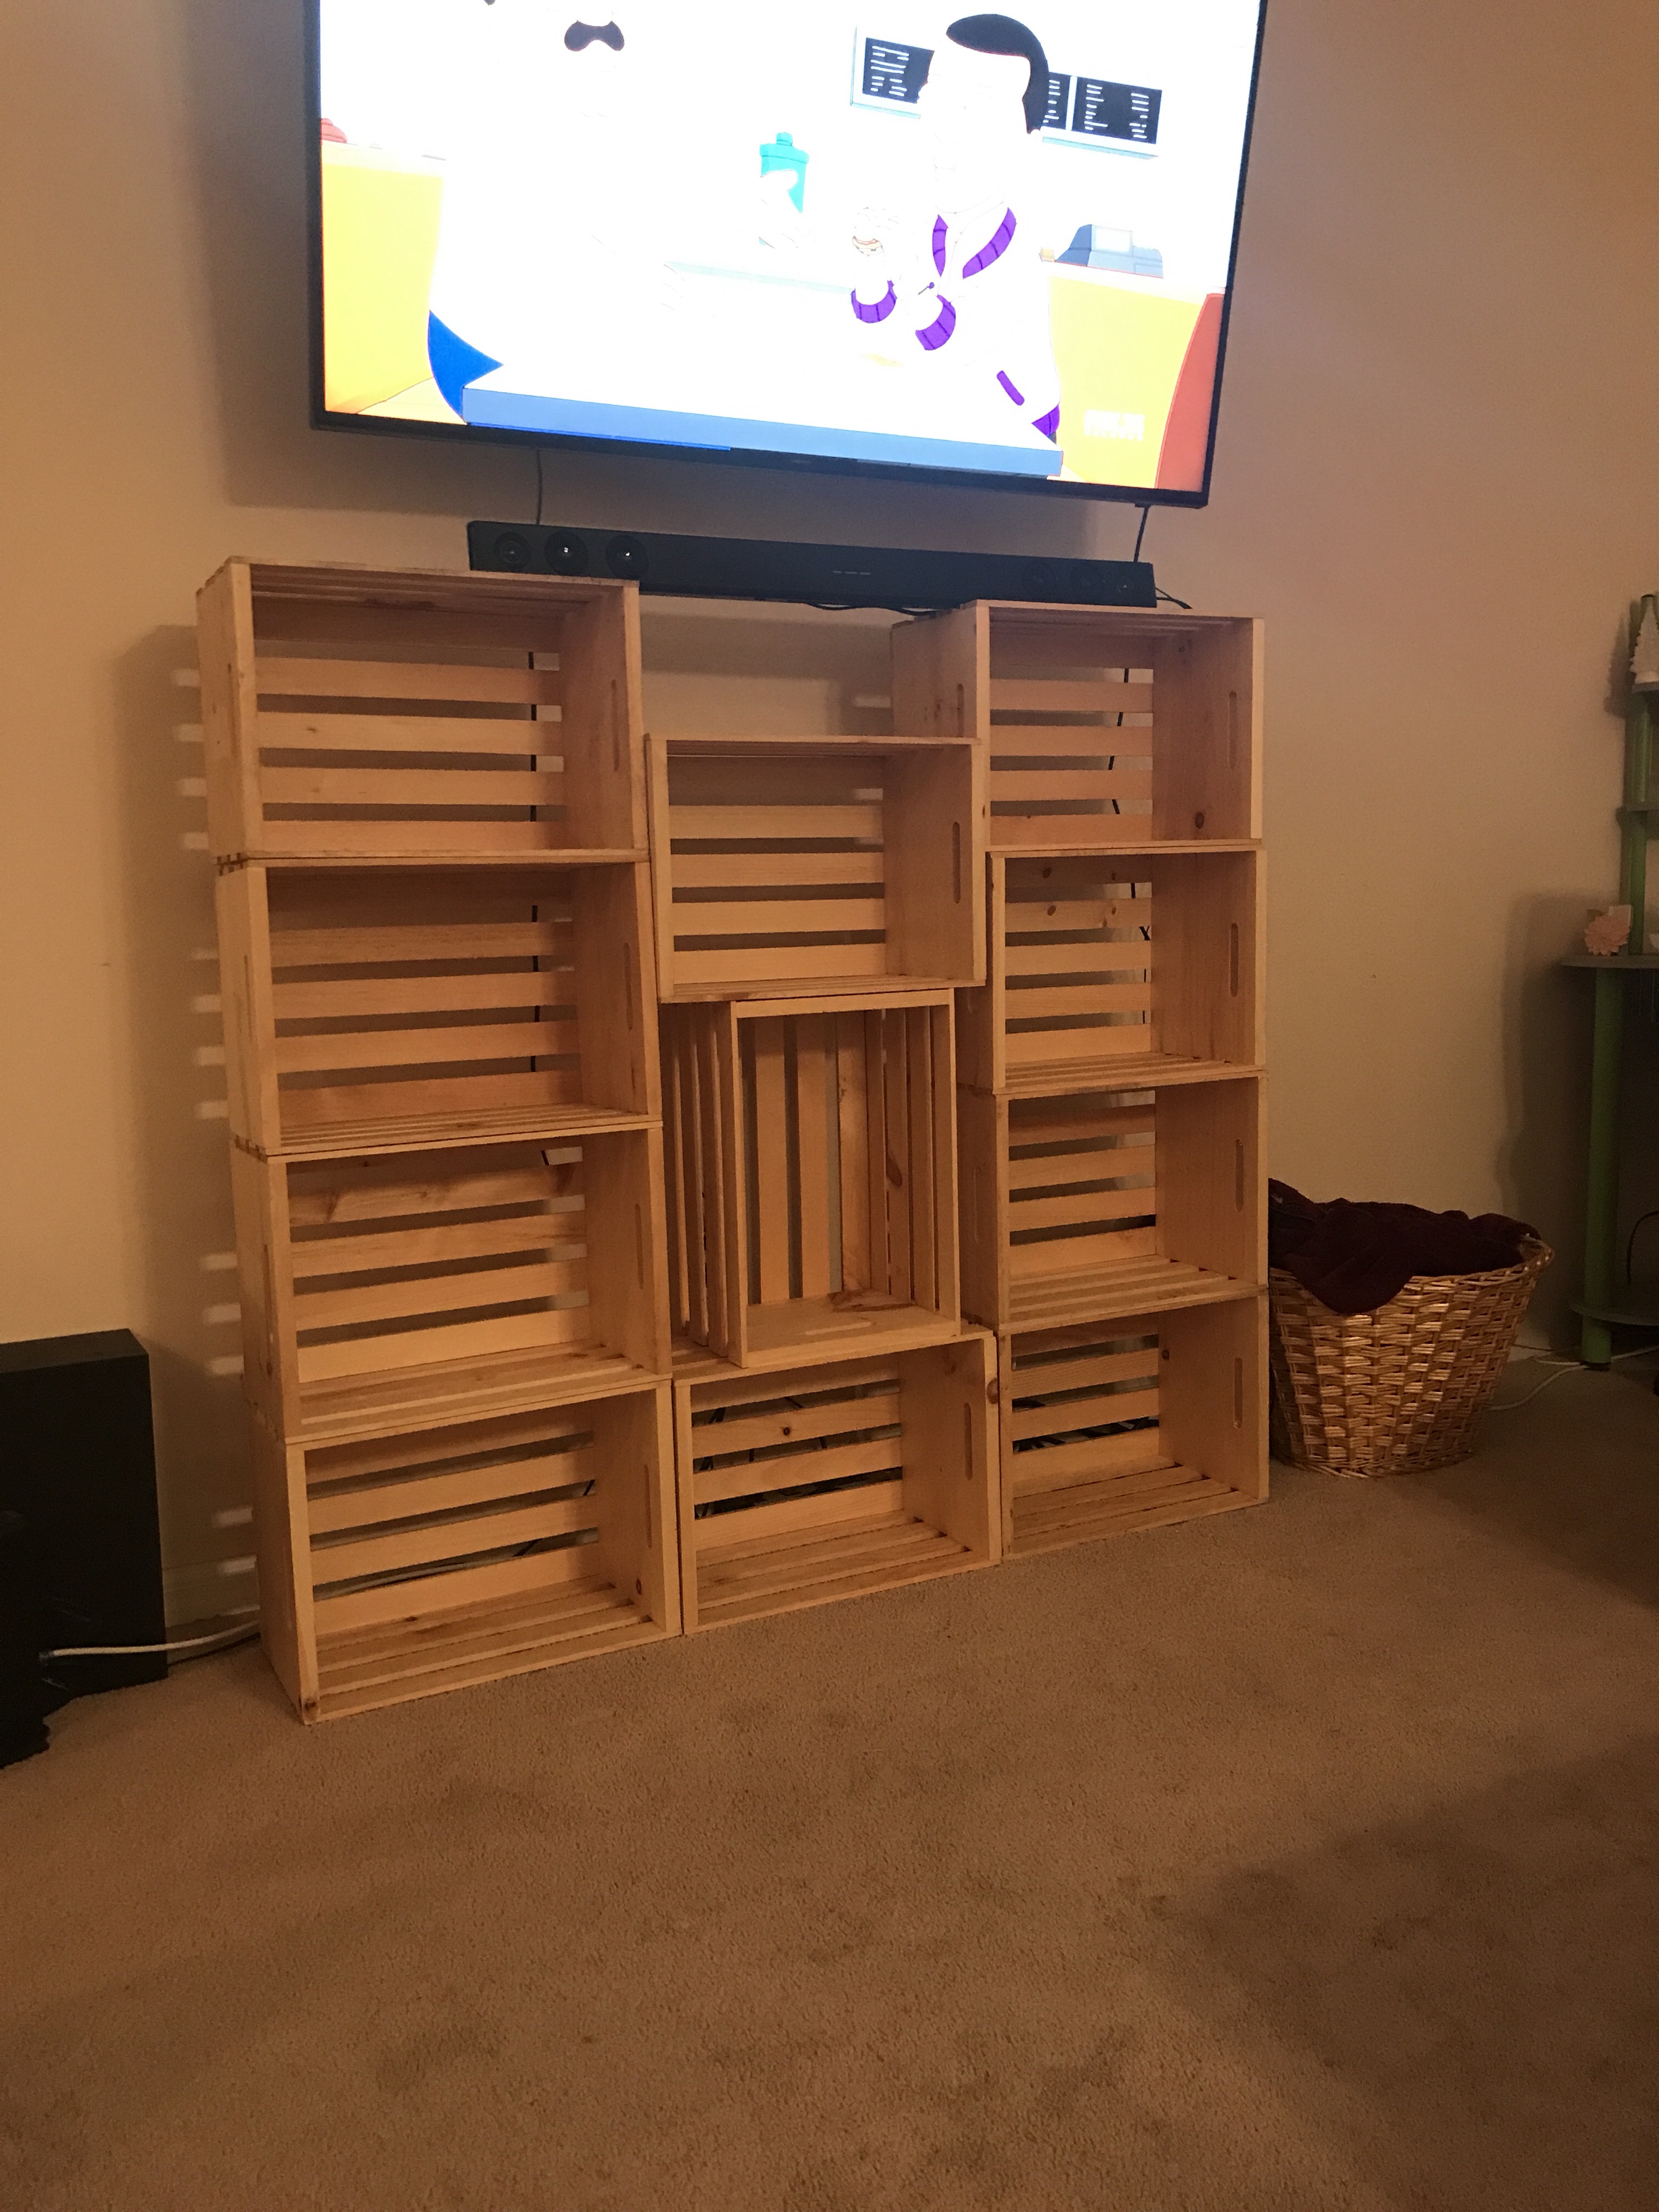
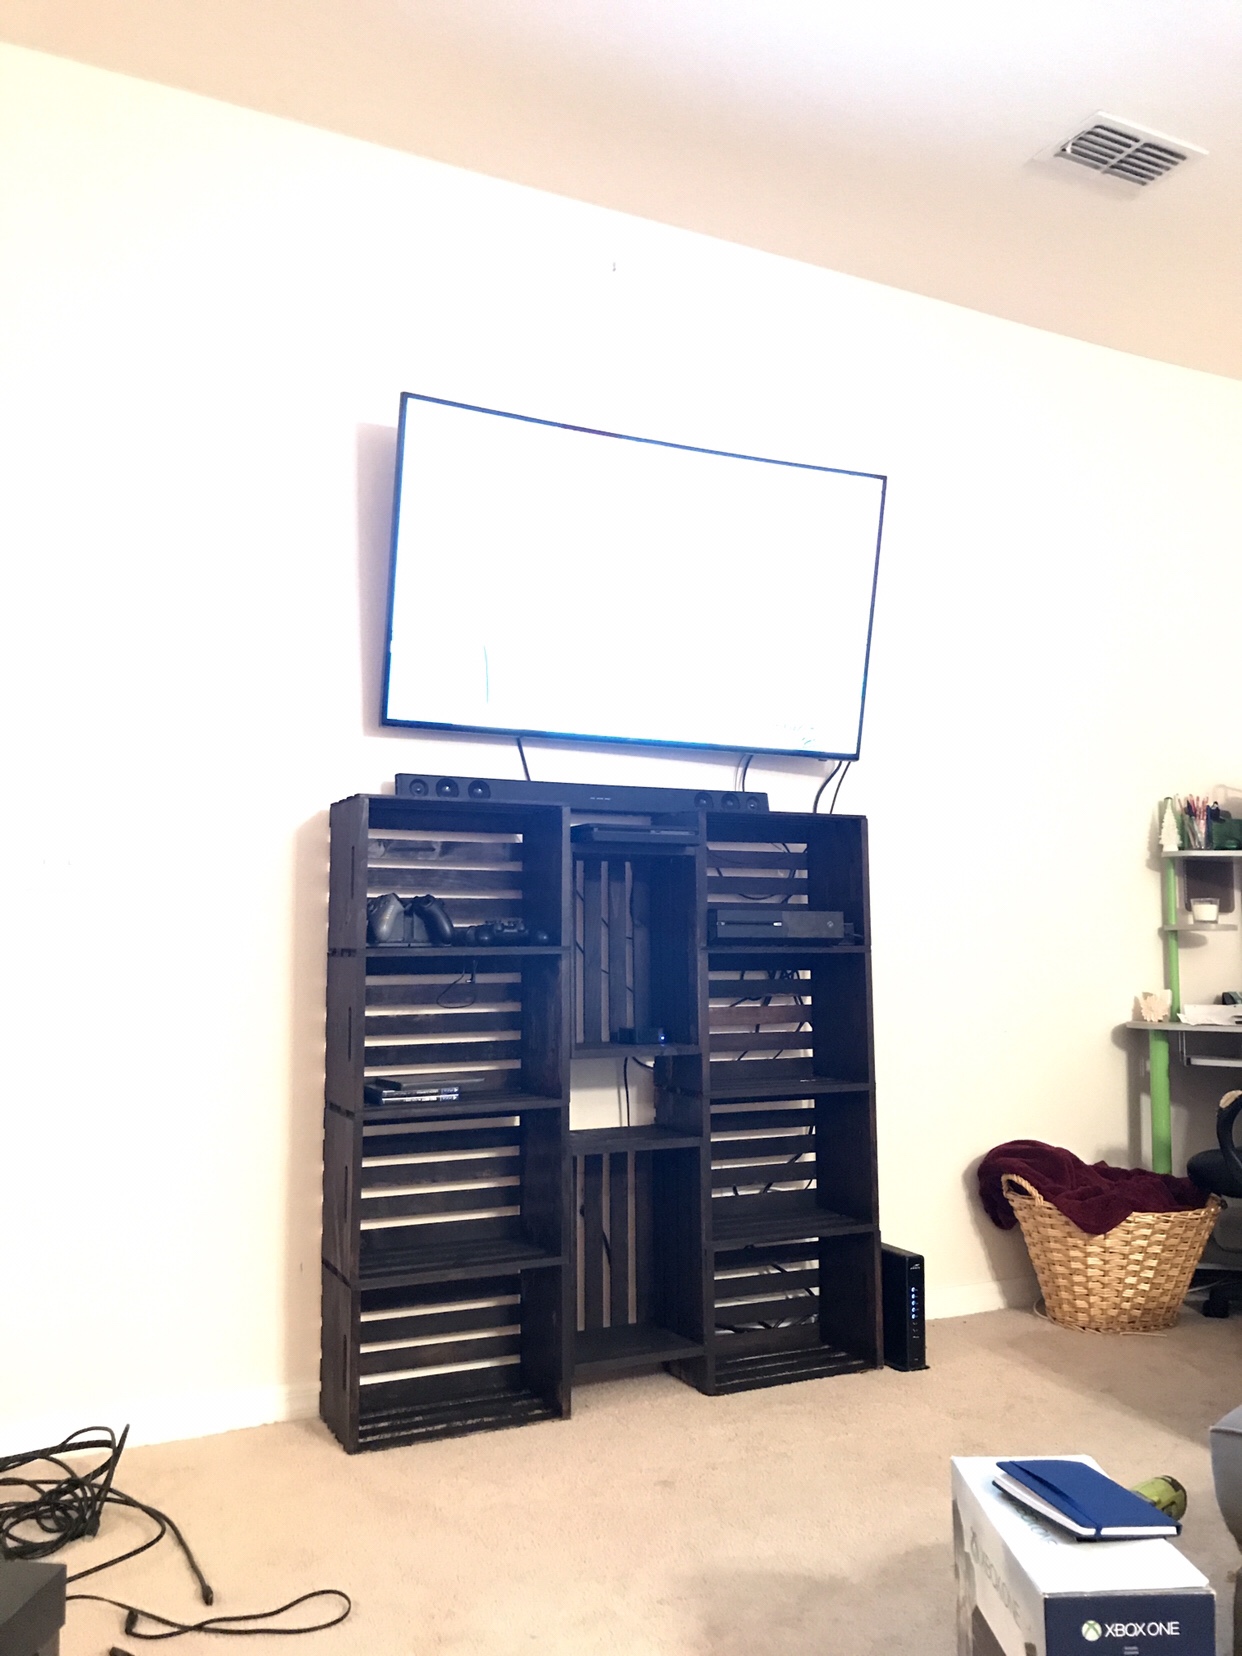
Hi loves, so I’m back again with my second home diy project of the series. Next up in this series we built and entertainment center. I briefly mentioned it in my last diy crate foyer table post. For this diy the materials and directions are pretty much the same only for a larger scale project. This was fun because we tried different patterns before we decided on a specific design. We had been looking for an entertainment center that we both loved the design of and that fit the measurements for underneath our tv without having to move or rehang things on the wall. This only took us about a day with the majority of time being waiting for it to fully dry. So if you’re ready to get started keep reading below.

Materials needed:
(10) 18”x12 1/2”x9 1/2” crates $11 each at Home Depot
5/8” brad staples $4.24 at Walmart
Staple gun (already had)
Wood Stain (I choose Kona a dark brown black)
Wood Glue (already had)
2” clamp (already had)
Measuring tape (already had)
Sprayer $10 at Home Depot
Stain rags $5
L brackets about $4
To begin:
Put the crates together to see how you want them organized and put together. It’s good to take a picture if you aren’t following a guide for your design so you don’t forget exactly how you put it together. (As discussed in the last post where we forgot how we first had it, lol.) This time we mocked up a few different ways before we came up with the actual design we liked.


Once your mock up is done, start from the bottom and work your way to the top gluing all the sides together. Like a puzzle basically. For this one the design that we picked it was easier to glue and staple all the four side crates together first and then glue and staple the center pieces last since they connect together in the middle to float. Use the clamp to hold a section in place once you’ve glued it while you staple it down. Continue until all parts are glued and stapled together. Make sure you’re checking to see if all front sides of the crates sit flush before letting glue set or starting to staple everything down. We also decided the 2 floating crates in the middle we would add a board inside them to make 2 shelves for more storage. (Those were stained, glued and stapled in after the whole center was put together and added in later.)


Once the glue has dried or mostly dried (about 30 mins) then you can carefully move it outside or in the garage to start staining. There are a few different ways you can lay the stain. We choose both a brush and spray method again because it was quicker in the last diy as well. The sprayer mainly helped cover a lot of the table and then we brushed it out everywhere on the wood and then wiped it down with the rags. We let it dry over night even though the stain usually dries in about an hour or so depending on how many coats you apply.


Once stain has set and dried you can now place your entertainment center where you want. Now you can put up your gaming systems, movies and etc. We also secured ours to the wall with an L bracket so if anyone bumped it or our 3 yr old went to grab something it didn’t go tumbling over, lol.


Completed Entertainment Center measurements:
49 3/4″ H 48 1/2″ W 9 1/2″ D
I hope you enjoyed this DIY. This one took a little longer mainly waiting for it to dry and because we decided to add shelves but still fun and creative none the less. Don’t forget to follow my Snapchat @lolanicolemua for sneak peeks of other diy projects and tag me on Twitter or Instagram @lolanicoleblogs if you try this DIY as well. I’d love to see how you made this your own if you decide to try it. I Hope you’re loving this series as much as we are and have an amazing day!
Always Remember You’re Beautiful!
-Lola
![Mini vacay haul from @temu there’s a bunch I’ve got my eye on and they have✨Free Shipping and Returns!✨
^
Click the link in my bio or 🔎 [Code: dkd4696] when you download the Temu app and claim $100 coupon bundle!
^
^
#temu #shoptemu #temufinds #temubaes #temulookbook #styletips #temuhaul #temustyle #lolanicoleblogs #vloggerlifestyle #thatgirl #thatgirlaesthetic #pinterestphoto #pinterestfashion #liveinspired #temupartner #temuaffiliateprogram](https://lolanicole.com/wp-content/plugins/instagram-feed/img/placeholder.png)


